Videos from a distance

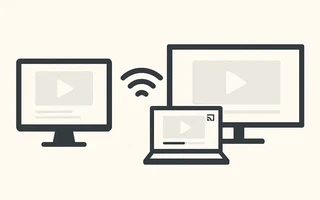
I went to watch a film I had downloaded onto an external drive connected to my older laptop.
Normally I plug that drive straight into the television, but this time I could not eject it, since
it was being used by other programs.
So I found myself with two options: watch the film on the 14" screen or find a way to stream the
video to my new laptop, which has an HDMI output, and enjoy all the sound and picture quality LG™
provides.
Like a good film-loving computer person (I am not), I picked the second option, and I am going to write here about how I solved the problem at the time, as well as other methods I found later.
1. Put the computers on a network
I did not have a router to set up a network. Since both laptops have wireless cards, I created an Ad-Hoc network, as explained in this post (without the internet part).
2. Find some way to exchange files
There are several ways to send packets from one computer to another on the network:
SSH
SSH was the first thing that came to mind, since I am used to it. I admit it is not a very good solution, since it uses a lot of CPU and increases network traffic for no reason (there is no point in using encryption unless you are paranoid or the video is extremely secret). In any case, it worked well like this:
Install and enable SSH on both computers:
sudo pacman -S openssh
sudo /etc/rc.d/sshd start
Connect Computer2 to Computer1 over ssh:
ssh julio@192.168.1.1Play the video
mplayer video.avi -display :0or
export DISPLAY=:0in case we need to use some other program that has no command for changing the display.
SSH with a pipe
Like the previous way, but piping the video straight into mplayer
ssh julio@192.168.1.2 "cat /media/externo/Videos/video.avi" | mplayer -cache 65536 -SSHFS
Install sshfs
sudo pacman -S sshfsMount the file system
sshfs julio@192.168.1.2:/media/externo /media/externoGo to the folder and play the video with
mplayeras if it were a local file.mplayer /media/externo/Videos/video.avi
SSH with X11
On the server, change the file
/etc/ssh/sshd_conffrom#X11forwarding noto
X11Forwarding yesor, on the client, edit /etc/ssh/ssh_config from
#ForwardX11 notoForwardX11 yes.Play the video with
mplayer
ssh -XY julio@192.168.1.2 mplayer /media/externo/Videos/video.aviSamba
Download Samba
Enable sharing of your videos folder
#  vim /etc/samba/smb.conf
[videos]
   comment = Videos do Julio
   path = /media/externo/Videos
   writable = no
   valid users = julio
   follow symlinks = yes
   wide links = yes
Mount the file system
sudo mount -t cifs //192.168.0.1/Videos /media/externo/Videos -o user=julio,password=PASSWORD,workgroup=WORKGROUPPlay the video with mplayer as if it were a local file
mplayer /media/externo/Videos/video.avi
Netcat
On the computer with the video:
cat /media/externo/Videos/video.avi | nc -l -p 9998On the computer connected to the TV:
nc 192.168.0.1 9998 | mplayer -vo x11 -cache 3000 -
VLC with sftp
file»Open Network…sftp://julio@10.211.55.3/media/externo/Videos/video.avi
Enter the login and the password
3. Converting
On my home network I managed to stream 720p video without trouble, even with my old computer on old wi-fi (802.11g). But if you want to do the same with 1080p video, or even stream over the internet, it can be worth converting the video in real time. You can use ffmpeg for that.
Preventing standby
To keep the monitor of the computer connected to the television from turning off automatically after
inactivity, we can disable standby through Xorg:
sudo vim /etc/X11/xorg.conf
And leave the ServerLayout section like the example below:
Section "ServerLayout"
        Identifier                  "Layout"
        Screen      0               "Screen0"
        Option      "Xinerama"      "true"
        Option      "BlankTime"     "0"
        Option      "StandbyTime"   "0"
        Option      "SuspendTime"   "0"
        Option      "OffTime"       "0"
EndSection
Links

I’m a Brazilian computer engineer based in Germany, passionate about tech, science, photography, and languages.
I’ve been programming for about two decades already, exploring everything from mobile apps and web development to machine learning. These days I focus on cloud SRE and data engineering.
I volunteer in the open source and Python communities, helping organize PyCon DE and PyData Berlin, mentoring, and contributing with code and translations.
On my blog, I share Linux tips, setup guides, and personal notes I’ve written for future reference. I hope others find them helpful as well. The content is available in multiple languages.
Browse my gallery for some of my photography.
Away from the keyboard, you’ll find me at concerts, playing clarinet, cycling, scuba diving, or exploring new places, cultures, and cuisines.
Always happy to connect! 🙂